This will be my first year hosting Thanksgiving! And I’m going the very sacrilegious route and not making turkey… I know.. It’s weird. But I’m not huge turkey person, and after a family consensus, I guess none of us really are. It’s good and all, but all that oven time… And the risk of totally botching it, I decided to skip it. Instead I will be making a Rosemary, Sage Pork Tenderloin. It’s delicious, super easy to make, and only takes 30 min in the oven. My kinda main dish! Of course I will also have an array of sides to go with, so hopefully no one will miss the turkey. (I’m sure I’ll take pics and blog about the meal, assuming I’m not a complete crazy person the day of!). I get a little crazy and the perfectionist in me tends to come out on such occasions as this… So we’ll see.
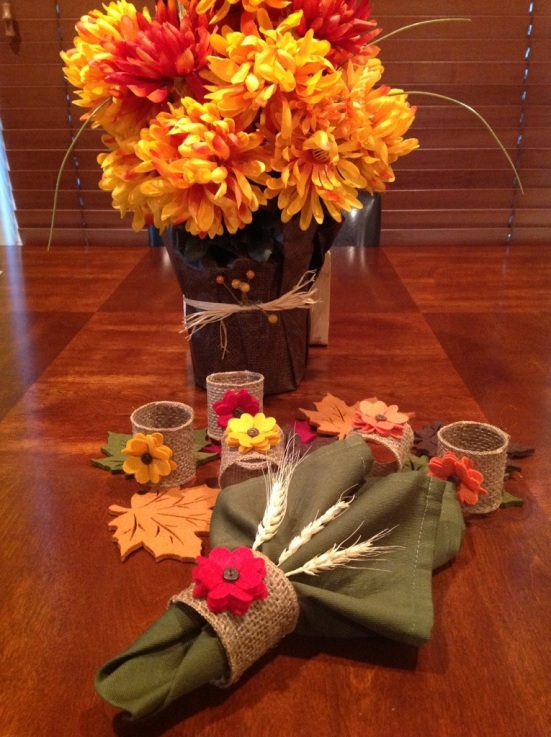
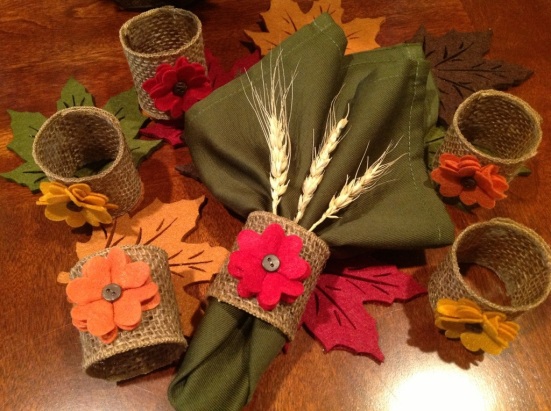
Anyway, to the napkin rings… I’ve been trying to plan out my tables decor for the big day, but didn’t want to spend a fortune on it. I brought some inexpensive fall colored napkins, and some of those felt coasters/placemats to scatter on the table. But when I got to the napkin ring section, at $3 each, I thought… I’ve got to be able to make something for less money than this. Que the Pinterest mission. I found several burlap napkin rings, and decided that would be perfect!
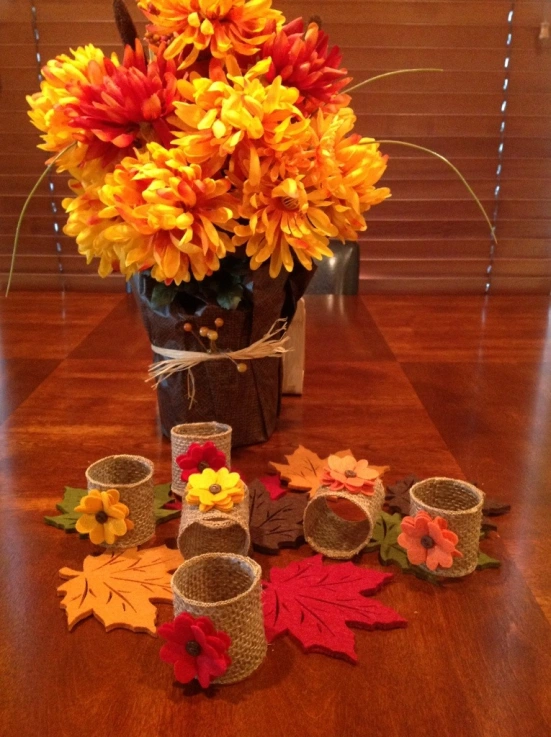
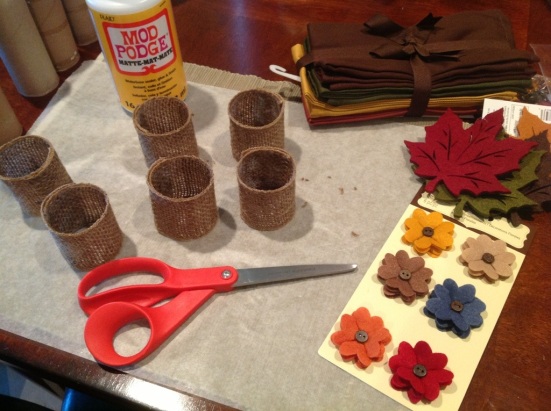
I bought a burlap ribbon that had a surged edge so it wouldn’t fray, and I found some cute felt flowers to be my decorative accent on the napkin ring. I also snagged some wheat springs (is that the right word??) to stick in for effect. Here’s the step by step that got me to my finished product.
Step 1:
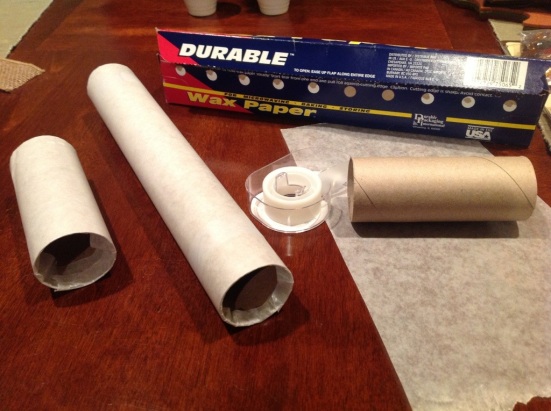
– Cut 7″ lengths of the burlap ribbon. I made 6, so I used a little less than a yard and a half.
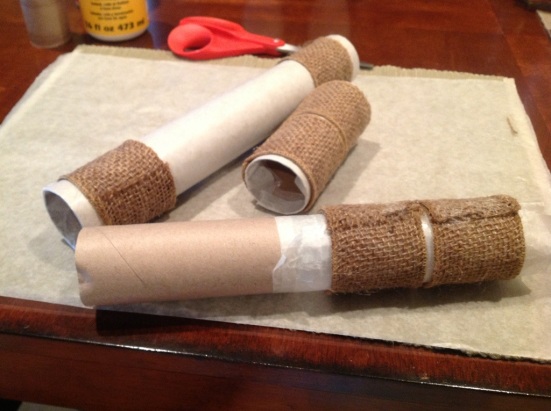
– Wrap toilet paper or paper towel rolls with wax paper and tape to hold. Use enough wax paper that it overhangs the edges. Then wrap the edges into the roll. It should hold on its own.
Step 2:
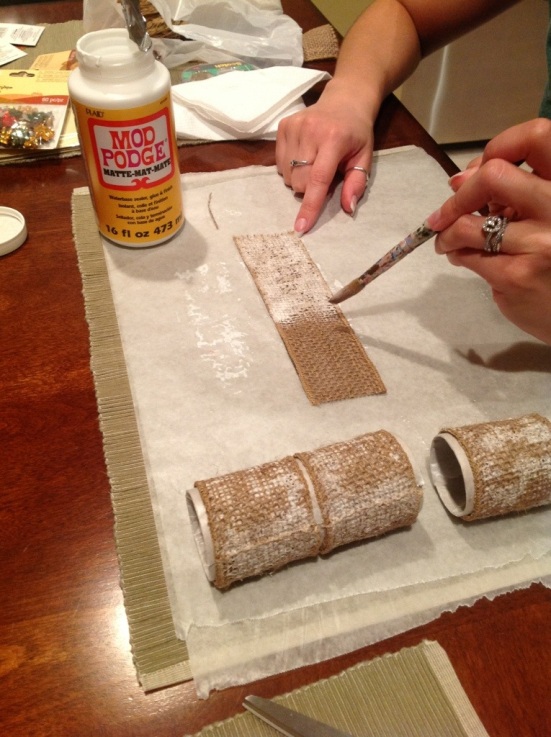
– Using MATTE finish Mod Podge and brush it, fairly heavily (enough to really cover and saturate the burlap) onto one side of your burlap. Leave a 1/2 inch dry.
– Wrap burlap around wax paper-covered roll, Mod Podge side against the roll (the outside will also have some Mod Podge on it, which is fine). I fit two on each toilet paper roll, you could fit maybe 4-5 on the paper towel roll.
– Brush a lot of Mod Podge on dry edge to help seal it to the rest of the burlap. You want this part to be good and strong so your rings stays together, so glob it on!
Step 3:
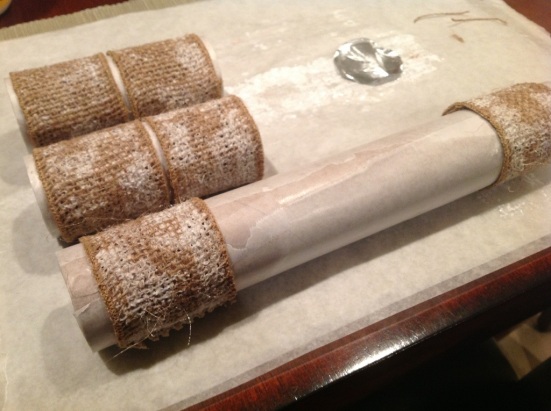
-Let it dry! I left mine overnight, and turned them a few times before I went to bed to help all the sides dry.
Step 4:
– They may still be a little wet at the seam (where you really globbed it on). Slide the wax paper right off the roll to make it easier to remove your rings.
– Gently hold your ring and peel the wax paper away from it.
Step 5:
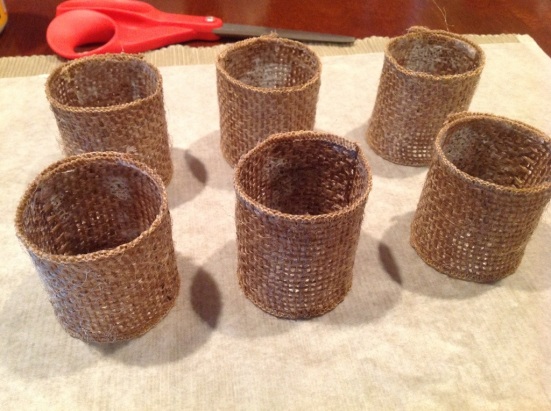
– Sit the rings on their edge, and let the seam finish drying.
Step 6:
– Trim any straggly burlap pieces (it will fuzz up a little from brushing on the Mod Podge) with scissors.
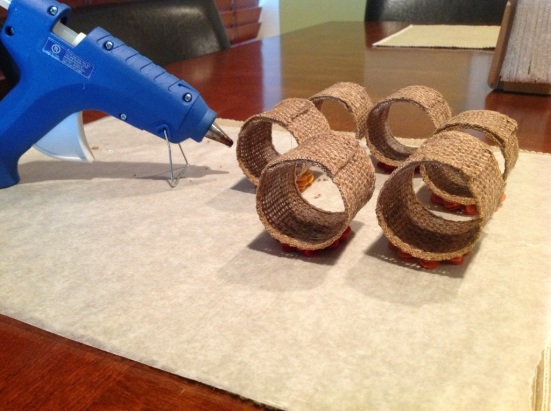
– Hot glue a decorative item on your choice onto the full dried rings.
– Rest them to dry.
Step 7:
– Fold your napkins and decorate your table!
Love this! Where did you get the fall colored napkins. I love that they are a combination of colors.
Thank you! I bought them several years ago, but I think they were from Bed Bath & Beyond sold as a set.
Beautiful, nice work just what I was looking for!